How to Make Naturally-Dyed Eggs At Home
April 14, 2022
If you’re planning to celebrate Easter this weekend or looking for a fun and affordable project for you and your family, look no further than your fridge! Did you know you can make beautiful, vibrant dye using things like onion skins, turmeric, and even purple cabbage? It’s true! And the colors these materials create will likely surprise you (hint: the color of the dye doesn’t always match the color of the material it came from!).
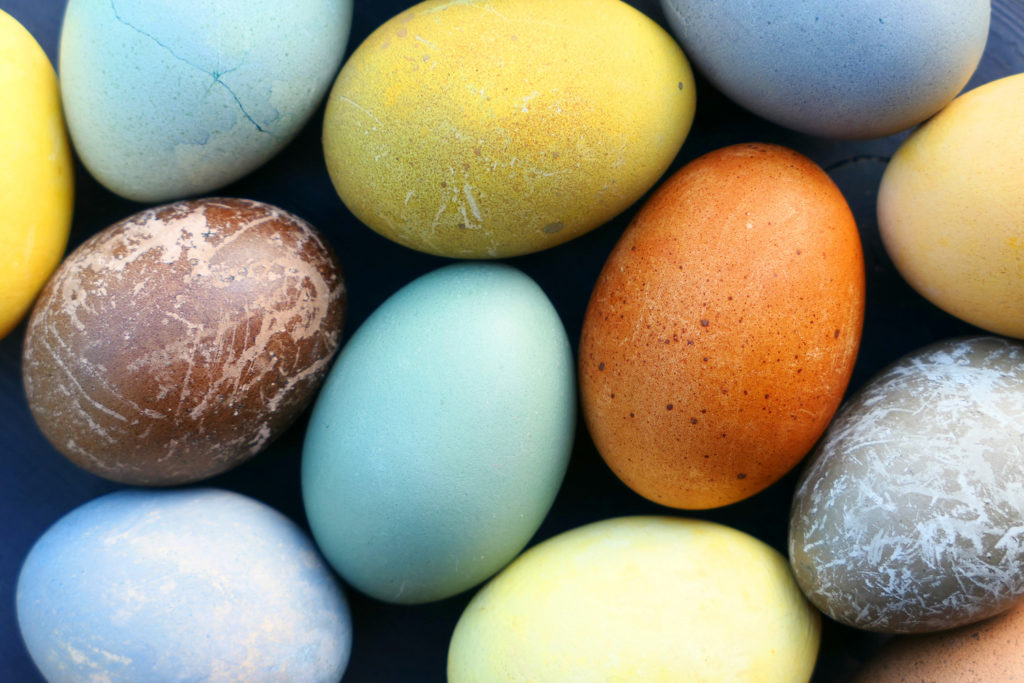
You can use these dyes to color unpeeled hard boiled white eggs or plain white muslin tea towels (like these)–whichever direction you choose, the result is sure to be colorful, unexpected, and FUN (and secretly educational, too!). The vibrance of the dye is dependent on how much material you use and how many times you dip the eggs or fabric in the dyes. If dying fabric or tea towels, be sure to wash them separately from your other laundry to prevent the color from transferring.
Ready to add some springtime color to your kitchen? Read on for the steps.
How to Make Naturally-Dyed Eggs
Materials:
- Unpeeled, hard-boiled, white eggs, at room temperature. Or white muslin tea towels
- Per cup of water used:
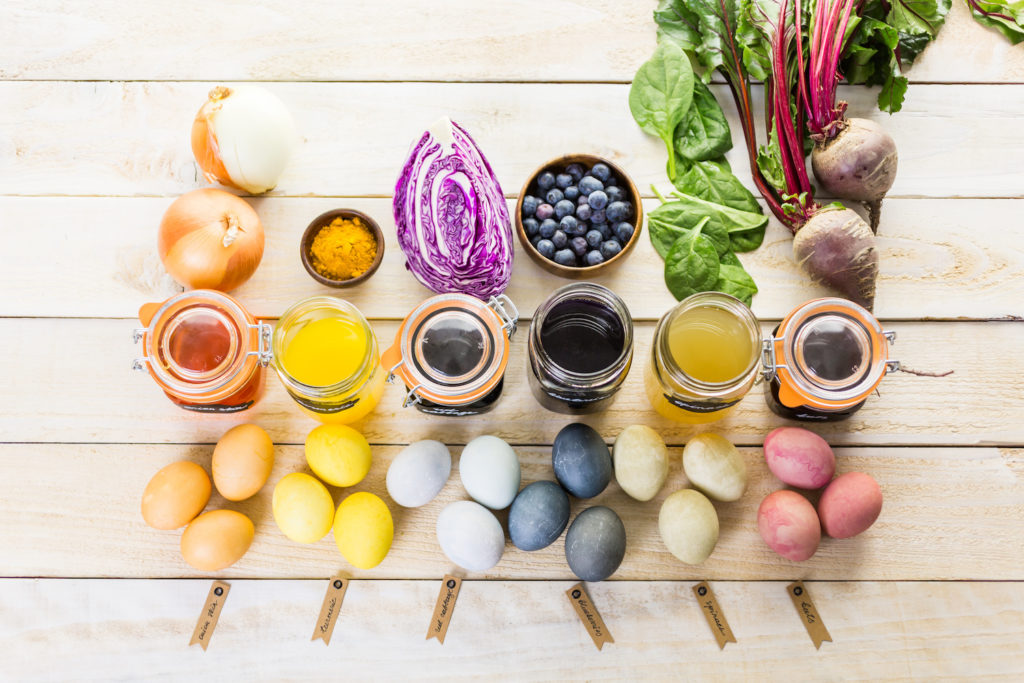
- 1 cup shredded beets
- 1 cup red onion skins
- 2 tablespoons ground turmeric
- 1 cup yellow onion skins
- 1 cup chopped purple cabbage
- 1 tablespoon white distilled vinegar per cup of dying liquid
- Saucepan with lid
- White dish or mug (for checking the opacity of your dye)
- Mesh strainer
- Spoons
- Paper towels
- Optional: Vegetable oil (for polishing eggs – you won’t need this if you’re dying fabric)
How to Make Natural Dyes at Home:
- Get your ingredients together. You can make one large batch of one color, or separate smaller batches of multiple colors. Keep in mind each color dye will need to be made separately. You can make several at once by using separate saucepans.
- Decide how much dye you want to make and add the appropriate amount of water to the saucepan.
- Add the dying materials and bring your water to a boil. At the boiling point, turn the heat to low and simmer for about 30 minutes.
- Your dye is ready to go when it reaches a color a few shades darker than you’d like your eggs or fabric to be. Test the dye by dripping it onto a white plate or mug. When it reaches the opacity you want, remove the pan from the heat and allow it to cool to room temperature. Repeat this process for however many separate dyes you choose to make.
- Once cooled, use a mesh strainer to strain the dye into a separate bowl or another saucepan, then add the vinegar into each dye (1 TBSP vinegar for each cup of strained liquid).
- Use spoons to gently lower eggs into the dye solutions making sure the eggs are completely covered (or, if using tea towels, submerge the fabric in the dyes), refrigerate eggs or fabric until saturated. For more vibrant colors, let eggs soak multiple times in the dye, drying them off between soaks.
- When the eggs have reached the color you want, dry them off with a paper towel and add a dab of vegetable oil to each one, rubbing it in to polish them up. For the fabric, squeeze out the dye and rinse in cold water (it’s natural for the dye to run). Air dry or pop in the dryer.
Store the eggs in the fridge until ready to serve, or use them for an egg hunt (just be sure to keep track of where they’re all hidden! No one likes a lost hard boiled egg).
(Adapted from this recipe)